> ## Documentation Index
> Fetch the complete documentation index at: https://docs.zapier.com/llms.txt
> Use this file to discover all available pages before exploring further.
# Add or modify integration branding and details
> When creating a new integration in the Platform UI from the link `https://developer.zapier.com/app/new`, you'll be prompted to add the app name, description, homepage URL and logo.
## Platform UI
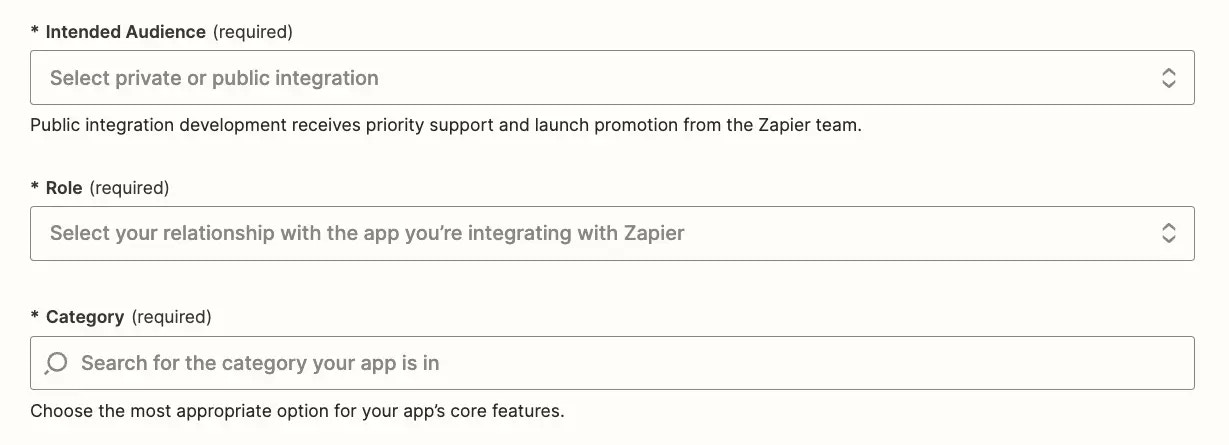
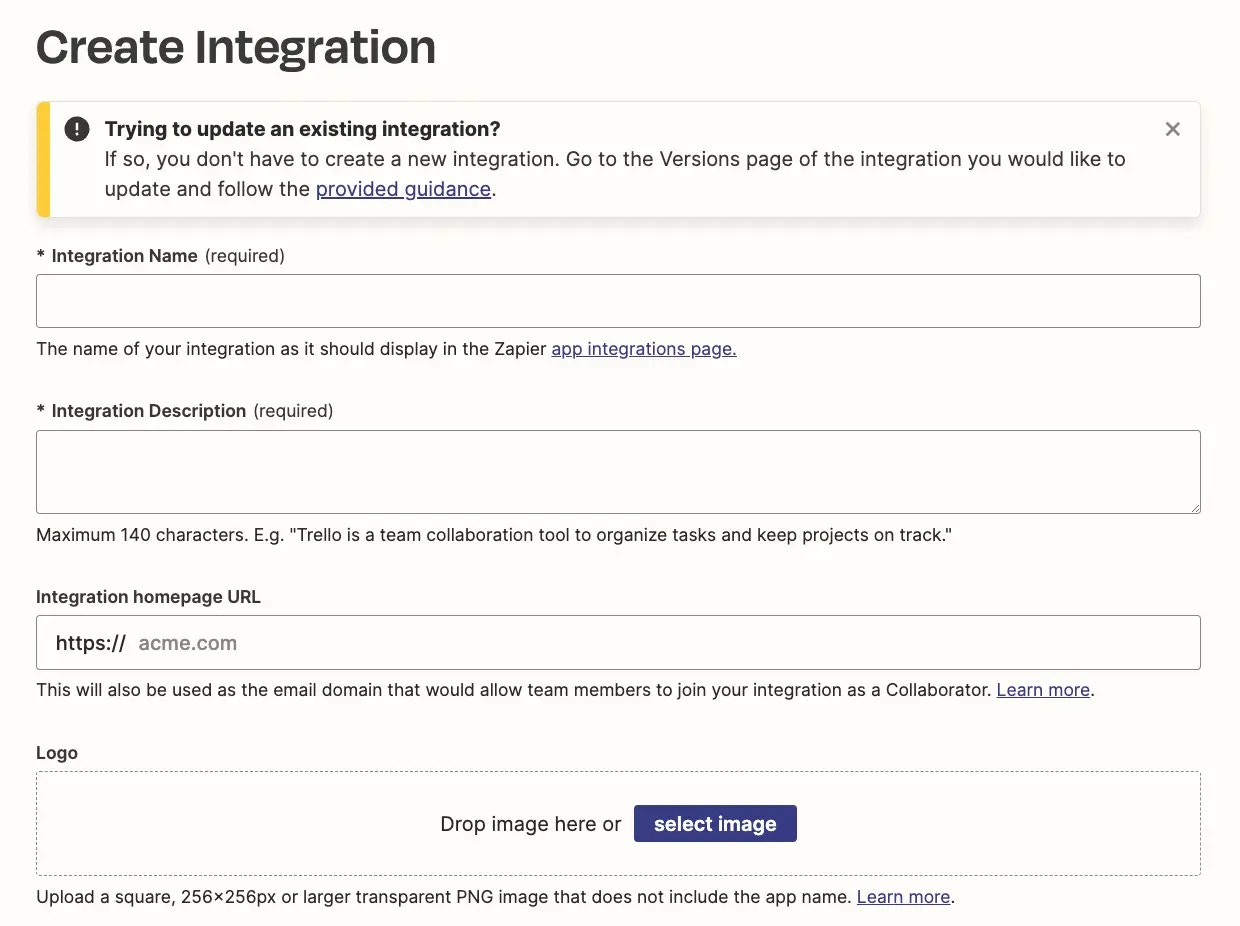 It is also required to complete the Intended Audience, your role and the app's category.
 ## Platform CLI
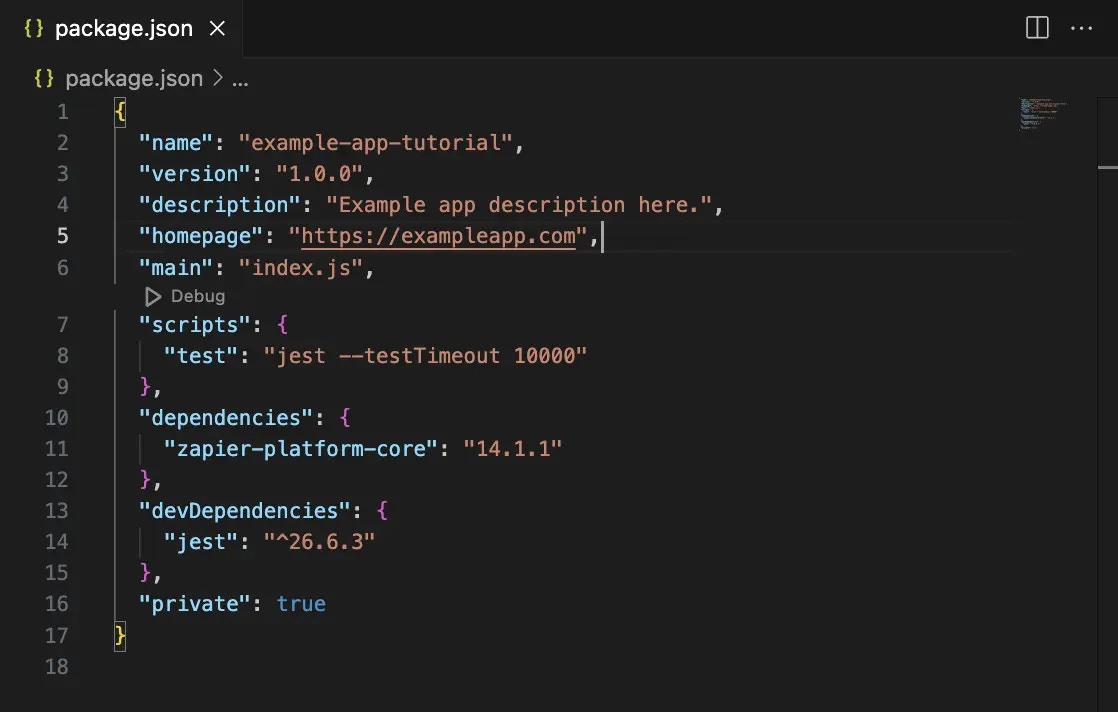
When creating a new integration in the Platform CLI, you can optionally add the app name, description, and homepage URL to the `package.json` file. The rest of your app's branding needs to be added in the Platform UI once you `zapier-platform push` (or deprecated `zapier push`) your integration for the first time.
## Platform CLI
When creating a new integration in the Platform CLI, you can optionally add the app name, description, and homepage URL to the `package.json` file. The rest of your app's branding needs to be added in the Platform UI once you `zapier-platform push` (or deprecated `zapier push`) your integration for the first time.
 Build your integration locally first. Once you've added your app's core details, authentication, triggers, and actions, push your integration to Zapier with a `zapier-platform push` (or deprecated `zapier push`) command. Zapier will use the name you added in the CLI integration settings, along with a placeholder icon for your app.
Next, add your app's branding via the Platform UI at [developer.zapier.com/](https://developer.zapier.com/). There you will see every Zapier integration you've built. The *My integrations* section includes every app you've added via Zapier's Platform UI or CLI. Look for the integration you built with Zapier CLI and select.
Build your integration locally first. Once you've added your app's core details, authentication, triggers, and actions, push your integration to Zapier with a `zapier-platform push` (or deprecated `zapier push`) command. Zapier will use the name you added in the CLI integration settings, along with a placeholder icon for your app.
Next, add your app's branding via the Platform UI at [developer.zapier.com/](https://developer.zapier.com/). There you will see every Zapier integration you've built. The *My integrations* section includes every app you've added via Zapier's Platform UI or CLI. Look for the integration you built with Zapier CLI and select.
 Only the branding for your CLI-built app can be edited in the UI; authentication, triggers, and actions must be edited in your local environment and pushed to Zapier.
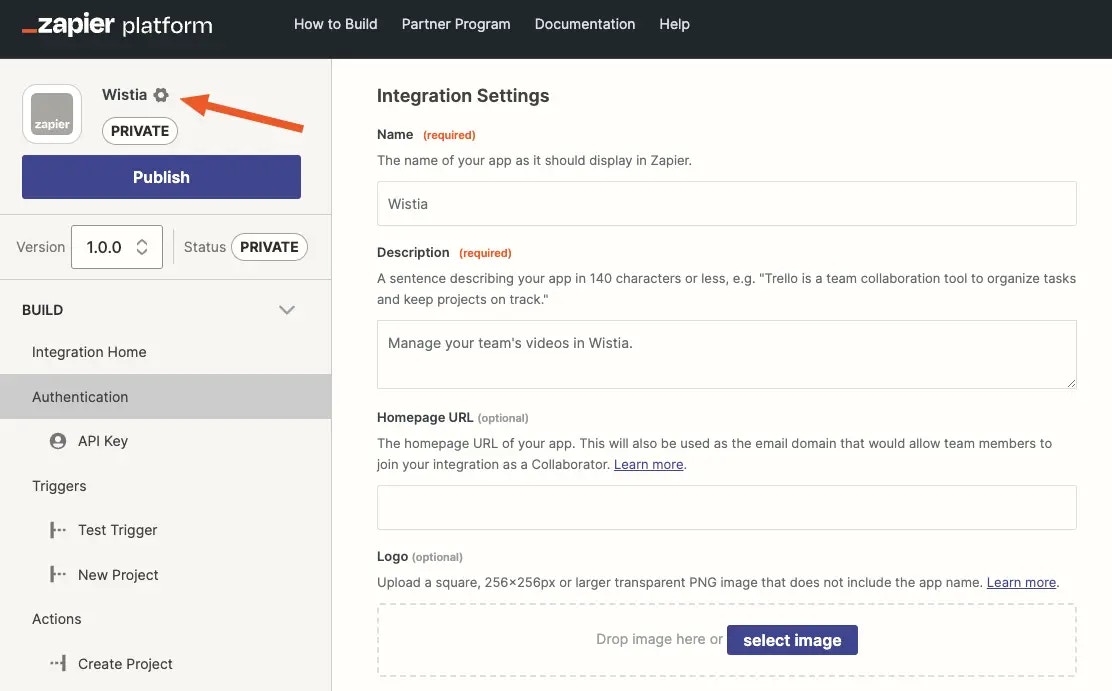
To edit branding, select the gear icon in the upper left hand corner near your app's name and placeholder icon. Edit your integration's name and description, and upload your app's logo (a square, transparent PNG at least 256x256px), meeting [requirements](/integrations/publish/branding-guidelines). Below that, set your app's Intended Audience, your role and the app's category. Select *Save*.
## Modify or rebrand your integration
### Private integrations
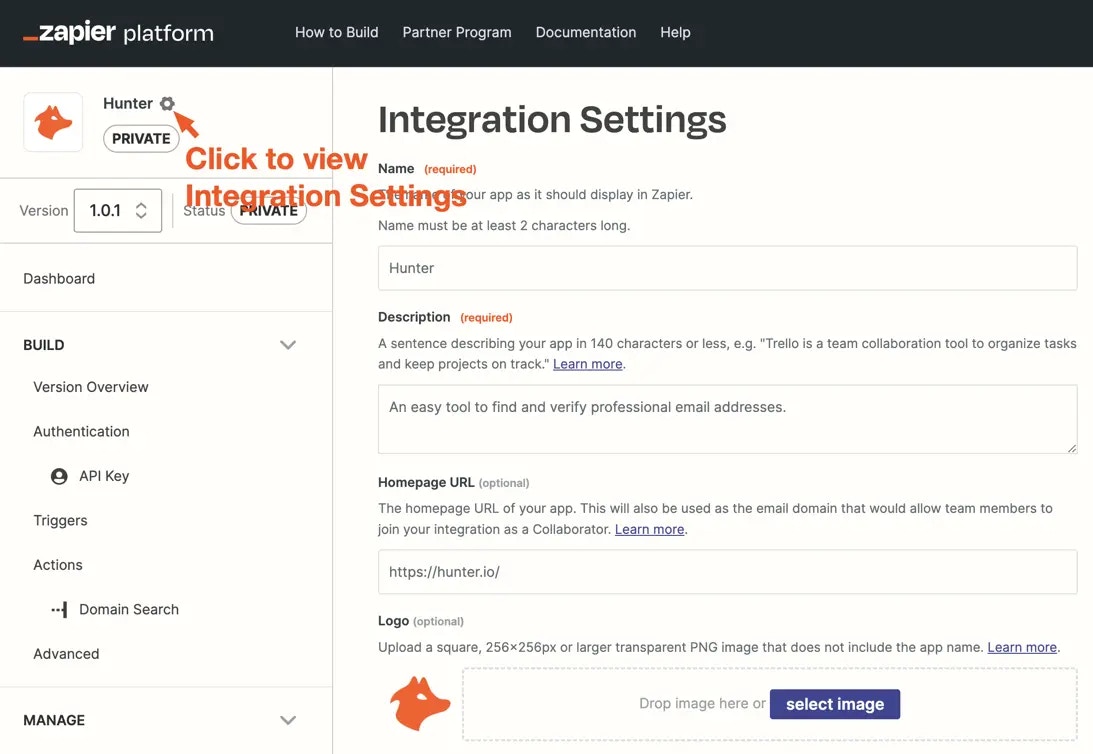
For integrations in `private` status, branding can be updated anytime on the Integration Settings page. Access Integration Settings by clicking the gear icon to the right of the integration name.
Only the branding for your CLI-built app can be edited in the UI; authentication, triggers, and actions must be edited in your local environment and pushed to Zapier.
To edit branding, select the gear icon in the upper left hand corner near your app's name and placeholder icon. Edit your integration's name and description, and upload your app's logo (a square, transparent PNG at least 256x256px), meeting [requirements](/integrations/publish/branding-guidelines). Below that, set your app's Intended Audience, your role and the app's category. Select *Save*.
## Modify or rebrand your integration
### Private integrations
For integrations in `private` status, branding can be updated anytime on the Integration Settings page. Access Integration Settings by clicking the gear icon to the right of the integration name.
 ### Public/Beta integrations
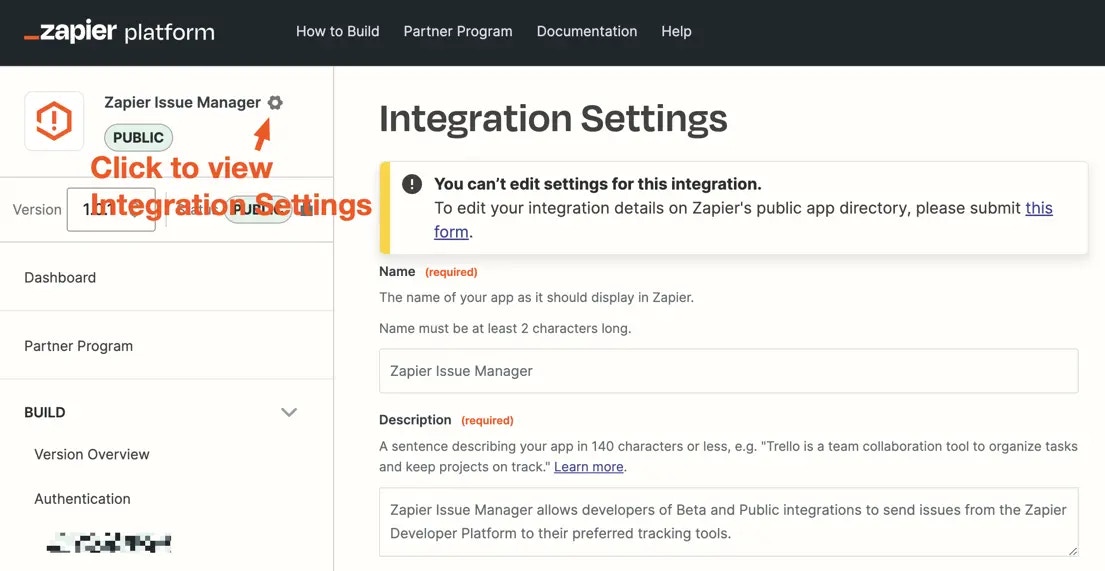
For integrations in `public` or `beta` status, branding changes need to be processed by our Partner Support team. To request branding changes, visit the Integration Settings page and click the form linked at the top of the page.
The app ID and your Zapier account email will automatically populate into the form. Provide only the details you want updated on your integration's directory page, and submit the form. You'll receive a confirmation email of your submission, and the Partner Support team will process the changes within 1 business day. You'll receive a second email confirming once the changes have been made.
### Public/Beta integrations
For integrations in `public` or `beta` status, branding changes need to be processed by our Partner Support team. To request branding changes, visit the Integration Settings page and click the form linked at the top of the page.
The app ID and your Zapier account email will automatically populate into the form. Provide only the details you want updated on your integration's directory page, and submit the form. You'll receive a confirmation email of your submission, and the Partner Support team will process the changes within 1 business day. You'll receive a second email confirming once the changes have been made.
 ***
*Need help? [Tell us about your problem](https://developer.zapier.com/contact) and we'll connect you with the right resource or contact support.*
***
*Need help? [Tell us about your problem](https://developer.zapier.com/contact) and we'll connect you with the right resource or contact support.*