Platform UI
Platform CLI
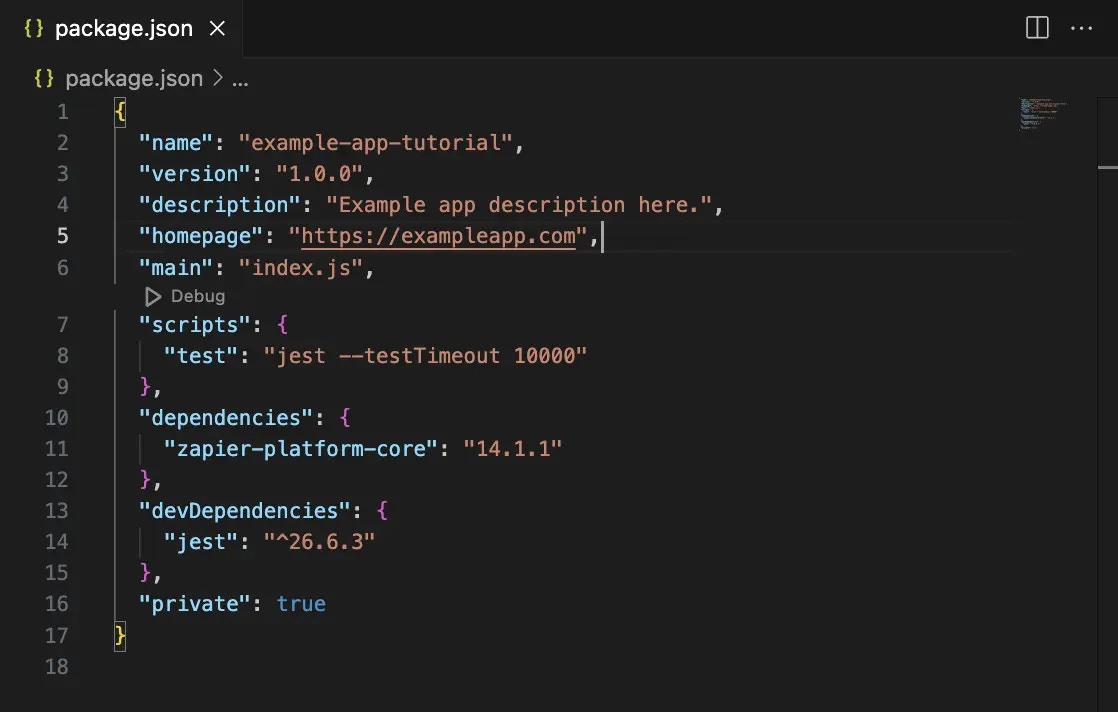
When creating a new integration in the Platform CLI, you can optionally add the app name, description, and homepage URL to thepackage.json file. The rest of your app’s branding needs to be added in the Platform UI once you zapier-platform push (or deprecated zapier push) your integration for the first time.
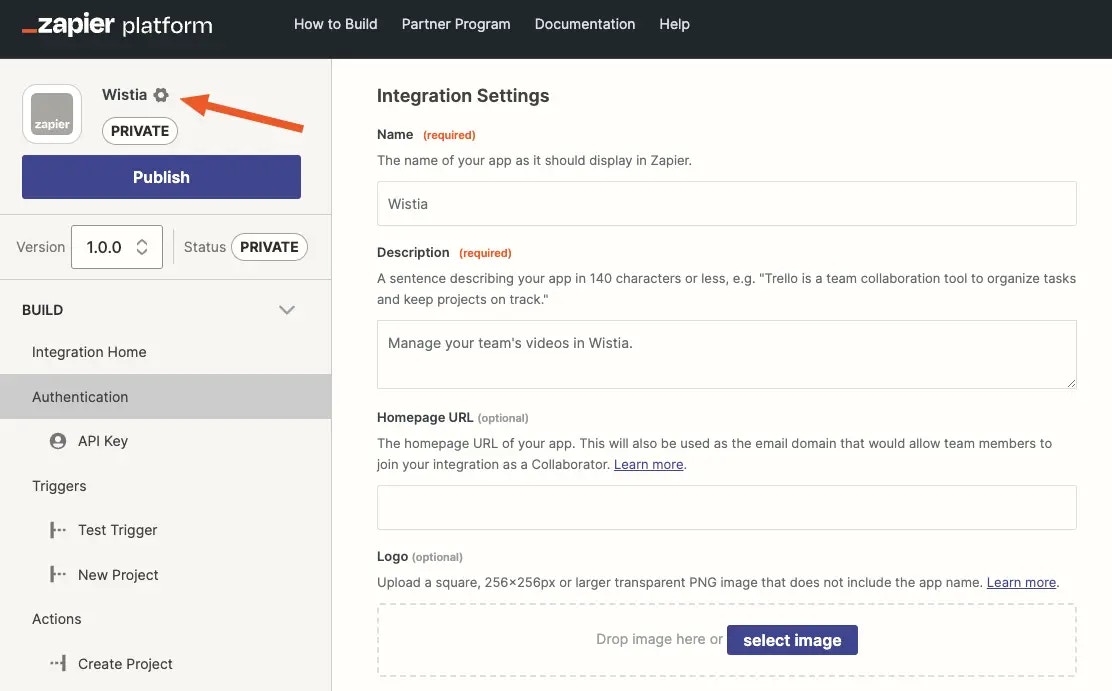
zapier-platform push (or deprecated zapier push) command. Zapier will use the name you added in the CLI integration settings, along with a placeholder icon for your app.
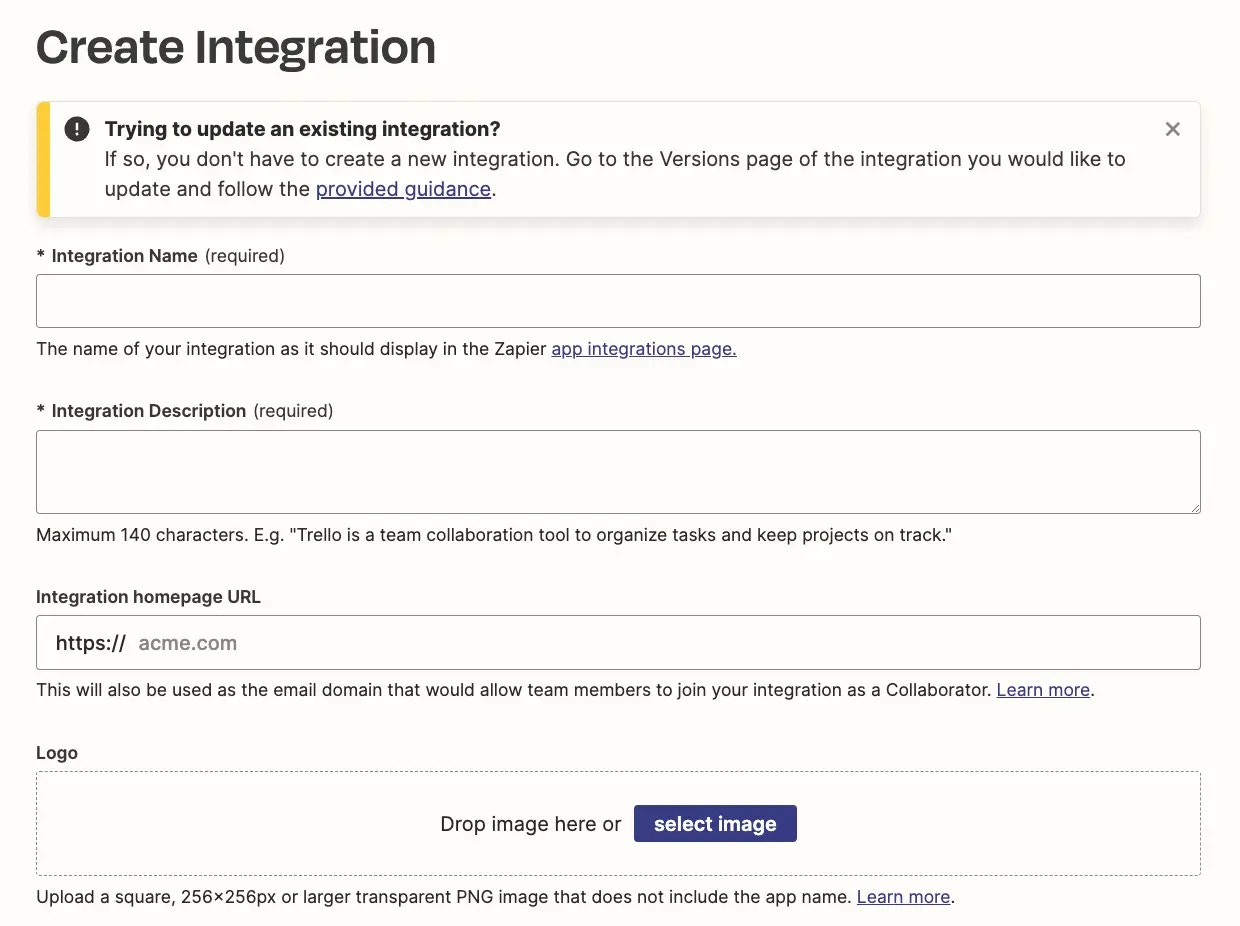
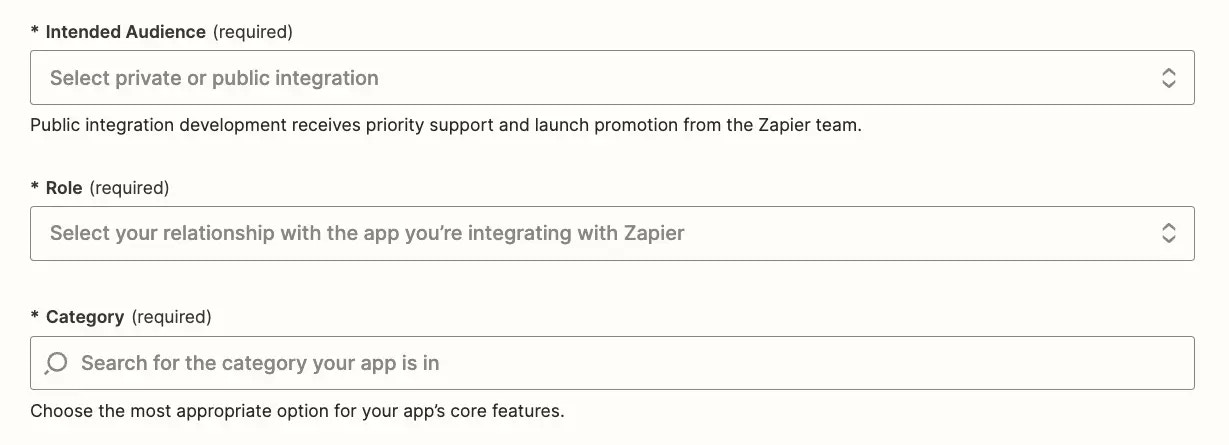
Next, add your app’s branding via the Platform UI at developer.zapier.com/. There you will see every Zapier integration you’ve built. The My integrations section includes every app you’ve added via Zapier’s Platform UI or CLI. Look for the integration you built with Zapier CLI and select.
Modify or rebrand your integration
Private integrations
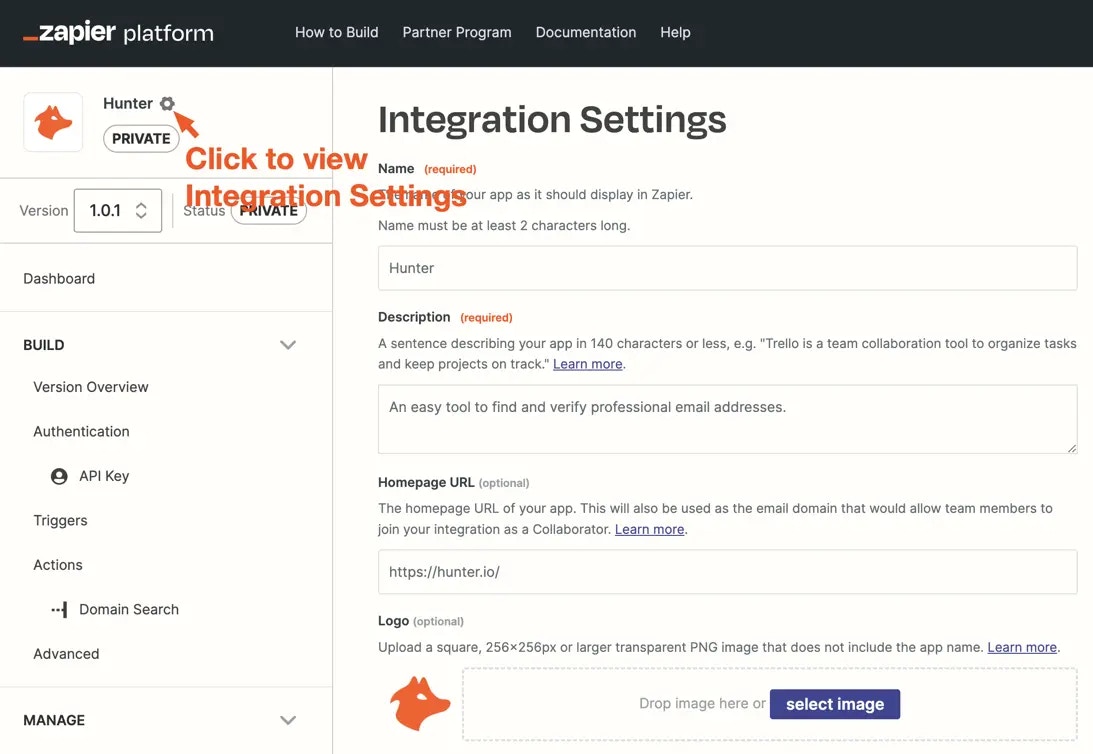
For integrations inprivate status, branding can be updated anytime on the Integration Settings page. Access Integration Settings by clicking the gear icon to the right of the integration name.
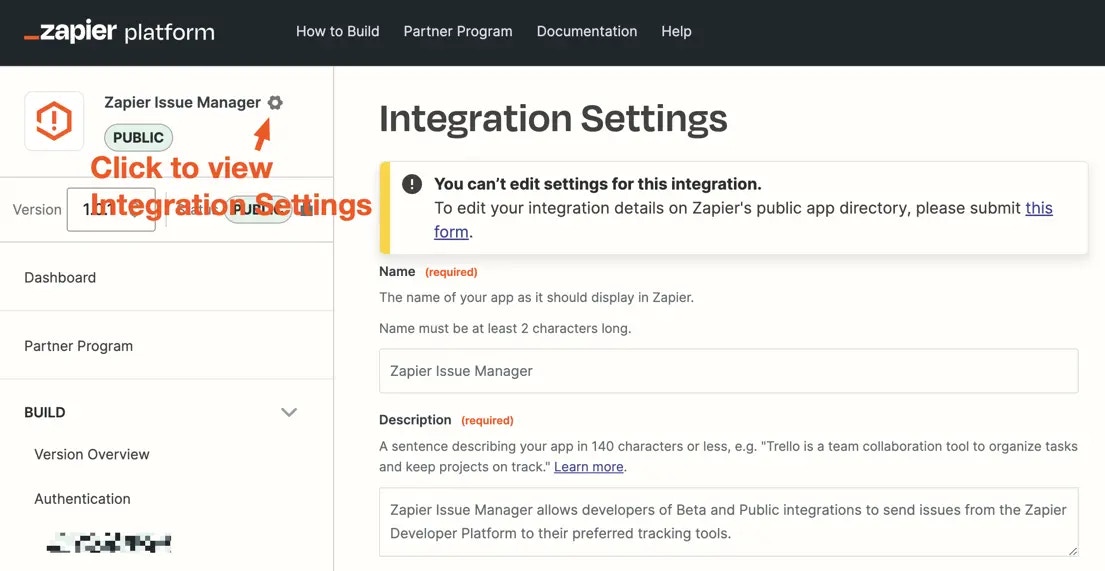
Public/Beta integrations
For integrations inpublic or beta status, branding changes need to be processed by our Partner Support team. To request branding changes, visit the Integration Settings page and click the form linked at the top of the page.
The app ID and your Zapier account email will automatically populate into the form. Provide only the details you want updated on your integration’s directory page, and submit the form. You’ll receive a confirmation email of your submission, and the Partner Support team will process the changes within 1 business day. You’ll receive a second email confirming once the changes have been made.
Need help? Tell us about your problem and we’ll connect you with the right resource or contact support.