Prerequisites
- Completed authentication configuration with your app’s authentication scheme
- Set of valid user credentials for your app - recommended to use a new account specifically for testing so you don’t clutter your core app account with testing data.
- A successful authentication test
Steps
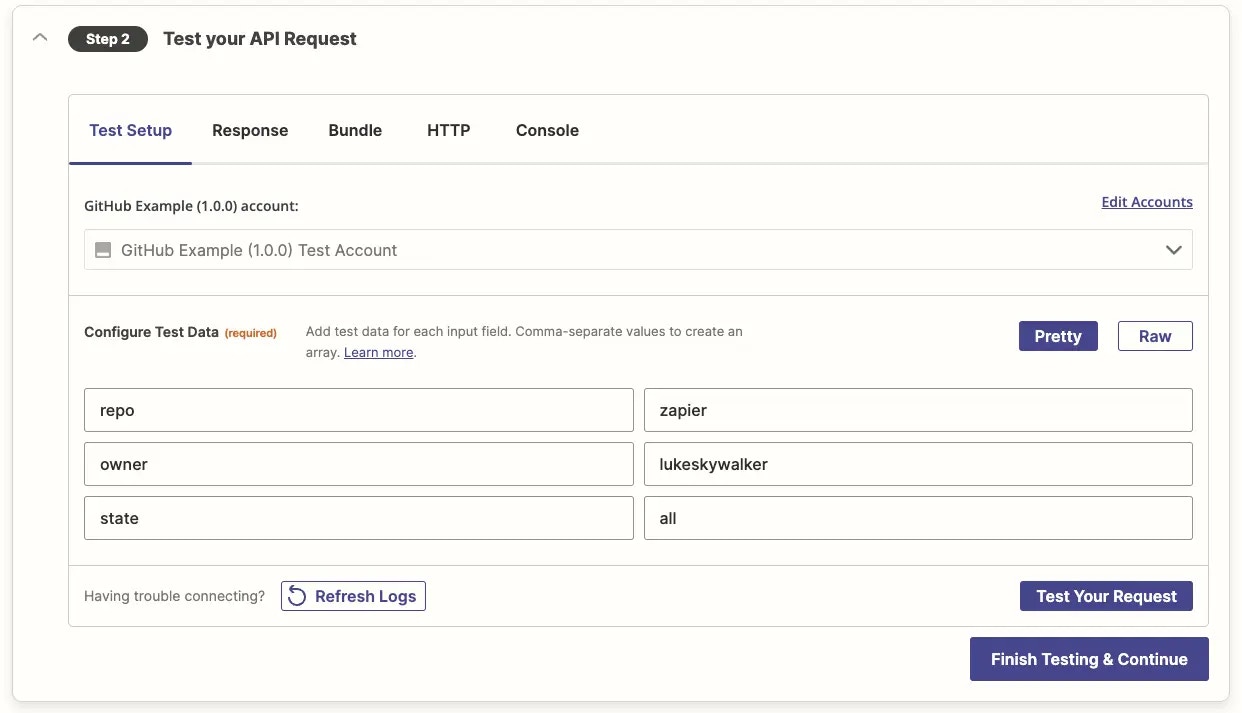
- Within API Configuration for each trigger or action, access the Test your API Request section
- Fill in details for each of the input fields in the Configure Test Data form. Add data that will successfully work in this API call, similar to what you would use in a live Zap.
- Enter individual values in each field to add single objects. If you include commas in the field data, Zapier will turn that field into an array sent to your API. Select Raw to preview the JSON formatted data.
- Select Test Your Request to run the trigger or action step, verify it ran successfully and show the JSON results which you can explore as in the Authentication testing.
-
If an error is returned, check the following:
- Authentication: Did your app’s authentication work correctly in the authentication step? You can only test an integration once you’ve connected an app account to Zapier.
- Test Data: Did your test data include the details your app expects, such as actual dates in date fields or complete email addresses in email address fields?
- Input Field Keys: Did you use the same field keys in your input field as your API expects? Double-check that in the Input Designer, and change if needed.
- API Call Customization: Does your API expect something different than the standard API call details Zapier sets by default? You may need to use Code Mode if the options you need aren’t available.
-
When testing a REST Hook trigger, you will instead have to create and test a Zap in the Zap Editor as follows:
- Test the trigger to confirm that the Perform List works and provides live data from the app.
- Turn on the Zap to confirm that the subscription is successful.
- Perform the trigger event in the app to confirm that the webhook is sent to the Zap’s webhook URL and triggers the Zap.
- Compare the data returned from the Perform (can be seen in the Zap history) with the data returned from the Perform List and confirm that they are both in the same format and have the same information in them.
- Turn off the Zap to confirm that the unsubscription is successful. A successful unsubscription should delete the Zap’s webhook URL from your app.
Need help? Tell us about your problem and we’ll connect you with the right resource or contact support.