Documentation Index
Fetch the complete documentation index at: https://docs.zapier.com/llms.txt
Use this file to discover all available pages before exploring further.
Prerequisites
- Understanding of the concept of deduplication and familiarity with how it is explained to users
1. Add the trigger settings
- Open the Triggers tab in Zapier’s Platform UI and select Add Trigger.
- On the Settings page, specify the following:
Hidden if this trigger should not be shown to users. Hidden is usually selected when the trigger is not ready to be used in the integration, or for polling triggers that power dynamic dropdown fields.
– Directions is used for static webhooks only to describe how and where to copy-paste the static webhook URL for the trigger within your app. Directions will not show to users in other cases. Static webhooks are not permitted in public integrations.
- Click on the Save and continue button.
2. Complete the Input Designer
On the Input Designer page, add user input fields needed by your API to watch for the triggering item. Trigger input fields allow users to enter filters, tags, and other details to filter through new or updated data at the endpoint. If no input data is needed for this trigger’s endpoint, continue.3. Set up the API Configuration
Platform UI selects a Polling trigger type by default.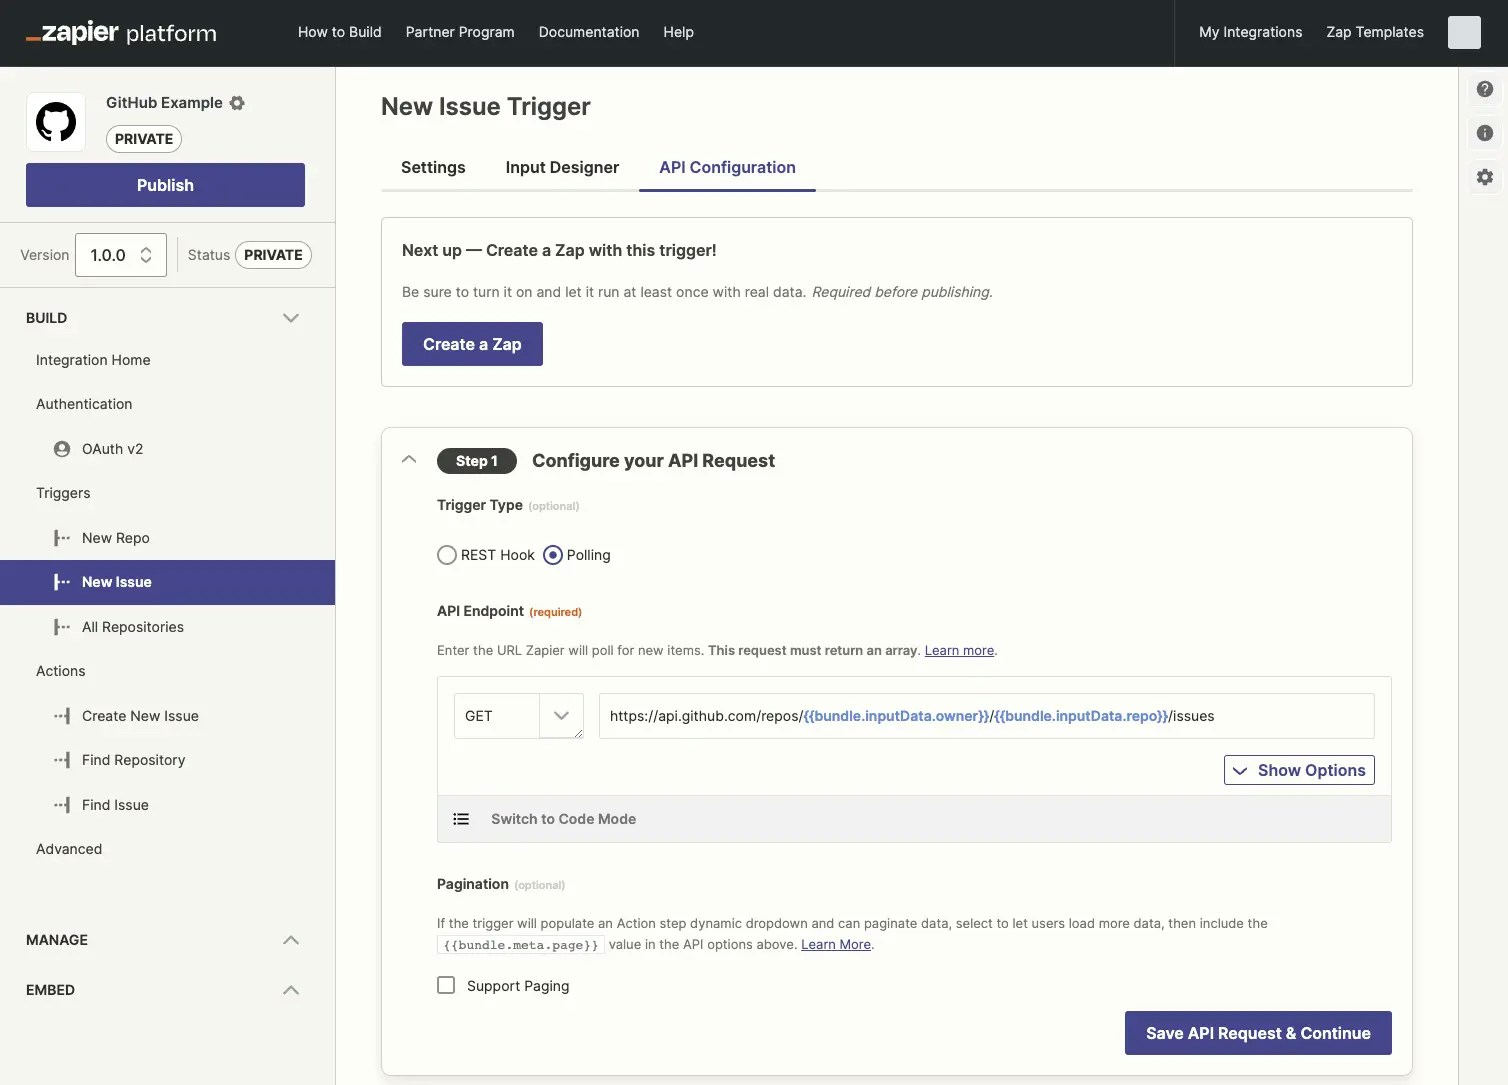
key with the input field key containing the relevant input field you created in the previous step:
{{bundle.inputData.key}}
Otherwise, Zapier will automatically include any input field data with the API call as URL parameters (for GET requests), or in the request body as JSON (for POST requests).
If your API requires any additional data to return the new or updated items in the expected response type of an array sorted in reverse chronological order, add it using the Show Options button to expose more detailed request configuration. Alternatively select Switch to Code Mode to further customize the API call in JavaScript code.
Only if you plan to use this trigger to power dynamic dropdown menus in other Zap steps (such as to find users, projects, folders, and other app data often used to create new items), and if your API call can paginate data, select Support Paging (see more details on dropdowns below).
Once you’ve added your trigger settings, click Save API Request & Continue.
4. Test your API request
Configure test data to test the polling trigger.5. Define your output
Define sample data and output fields following the guide.Need help? Tell us about your problem and we’ll connect you with the right resource or contact support.