Benefits to building a public integration
- Building a public integration on the Zapier Developer Platform is free.
- There are no fees for publishing an integration.
- Users of your integration are responsible for their own Zapier plans and billing.
- Partners do not incur fees as a result of the usage of their integration.
- You’ll get support from Zapier’s Partner Program once your app has been successfully reviewed.
1. Before you start
Consider workflows your app will support, and what types of activities your users want to automate. Learn how Zapier works and set up a few Zap workflows to get a sense of the user experience. To design useful triggers and actions for your integration, consider how your users might need data from your app to run other parts of their business. Some of the most popular use cases for Zapier integrations include:- Sending follow-up emails or messages
- Copying data from a bill or invoice into another system
- Updating contact records in multiple databases
- Creating or updating records in a project management tool
2. Build your integration
Building a Zapier integration means identifying the relevant APIs for your triggers and actions, and designing an intuitive experience for your users to select and map the data they need. There are two ways to build an integration on Zapier’s Platform:- The Platform UI lets you create a Zapier integration in your browser without code using API endpoint URLs. You can set any custom options your API may need, including custom URL params, HTTP headers, and request body items.
- Zapier Platform CLI lets you build a Zapier integration in your local development environment, collaborate with version control and CI tools, and push new versions of your integration from the command line.
3. Test your integration
While you’re building your integration, you can test your API requests within the Developer Platform. For developers building on Zapier Platform CLI, you can write unit tests that run locally, in a CI tool like Travis. To get a sense of the user experience, it’s recommended to test your integration within the Zap editor. Create a new Zap that uses your integration’s triggers or actions to ensure they all work as expected. After you’re done building, invite users to try your integration before making it available to a wider audience. Learn more about testing your integration:4. Submit your integration for app review
After you’ve confirmed your integration is working as expected, you’re almost ready to publish your app. To publish your integration, you need to submit your app for review by Zapier. Before submitting your integration, review Zapier’s integration publishing requirements or ask the PublishBot for a smoother app review process. To submit your integration for app review:- Log into the Platform UI
- Select your integration.
- In Integration Home, click Publish.
- You’ll need to complete the online form.
- Click Submit for Review.
- App version to Pending.
- App status will remain as Private.
5. Beta phase
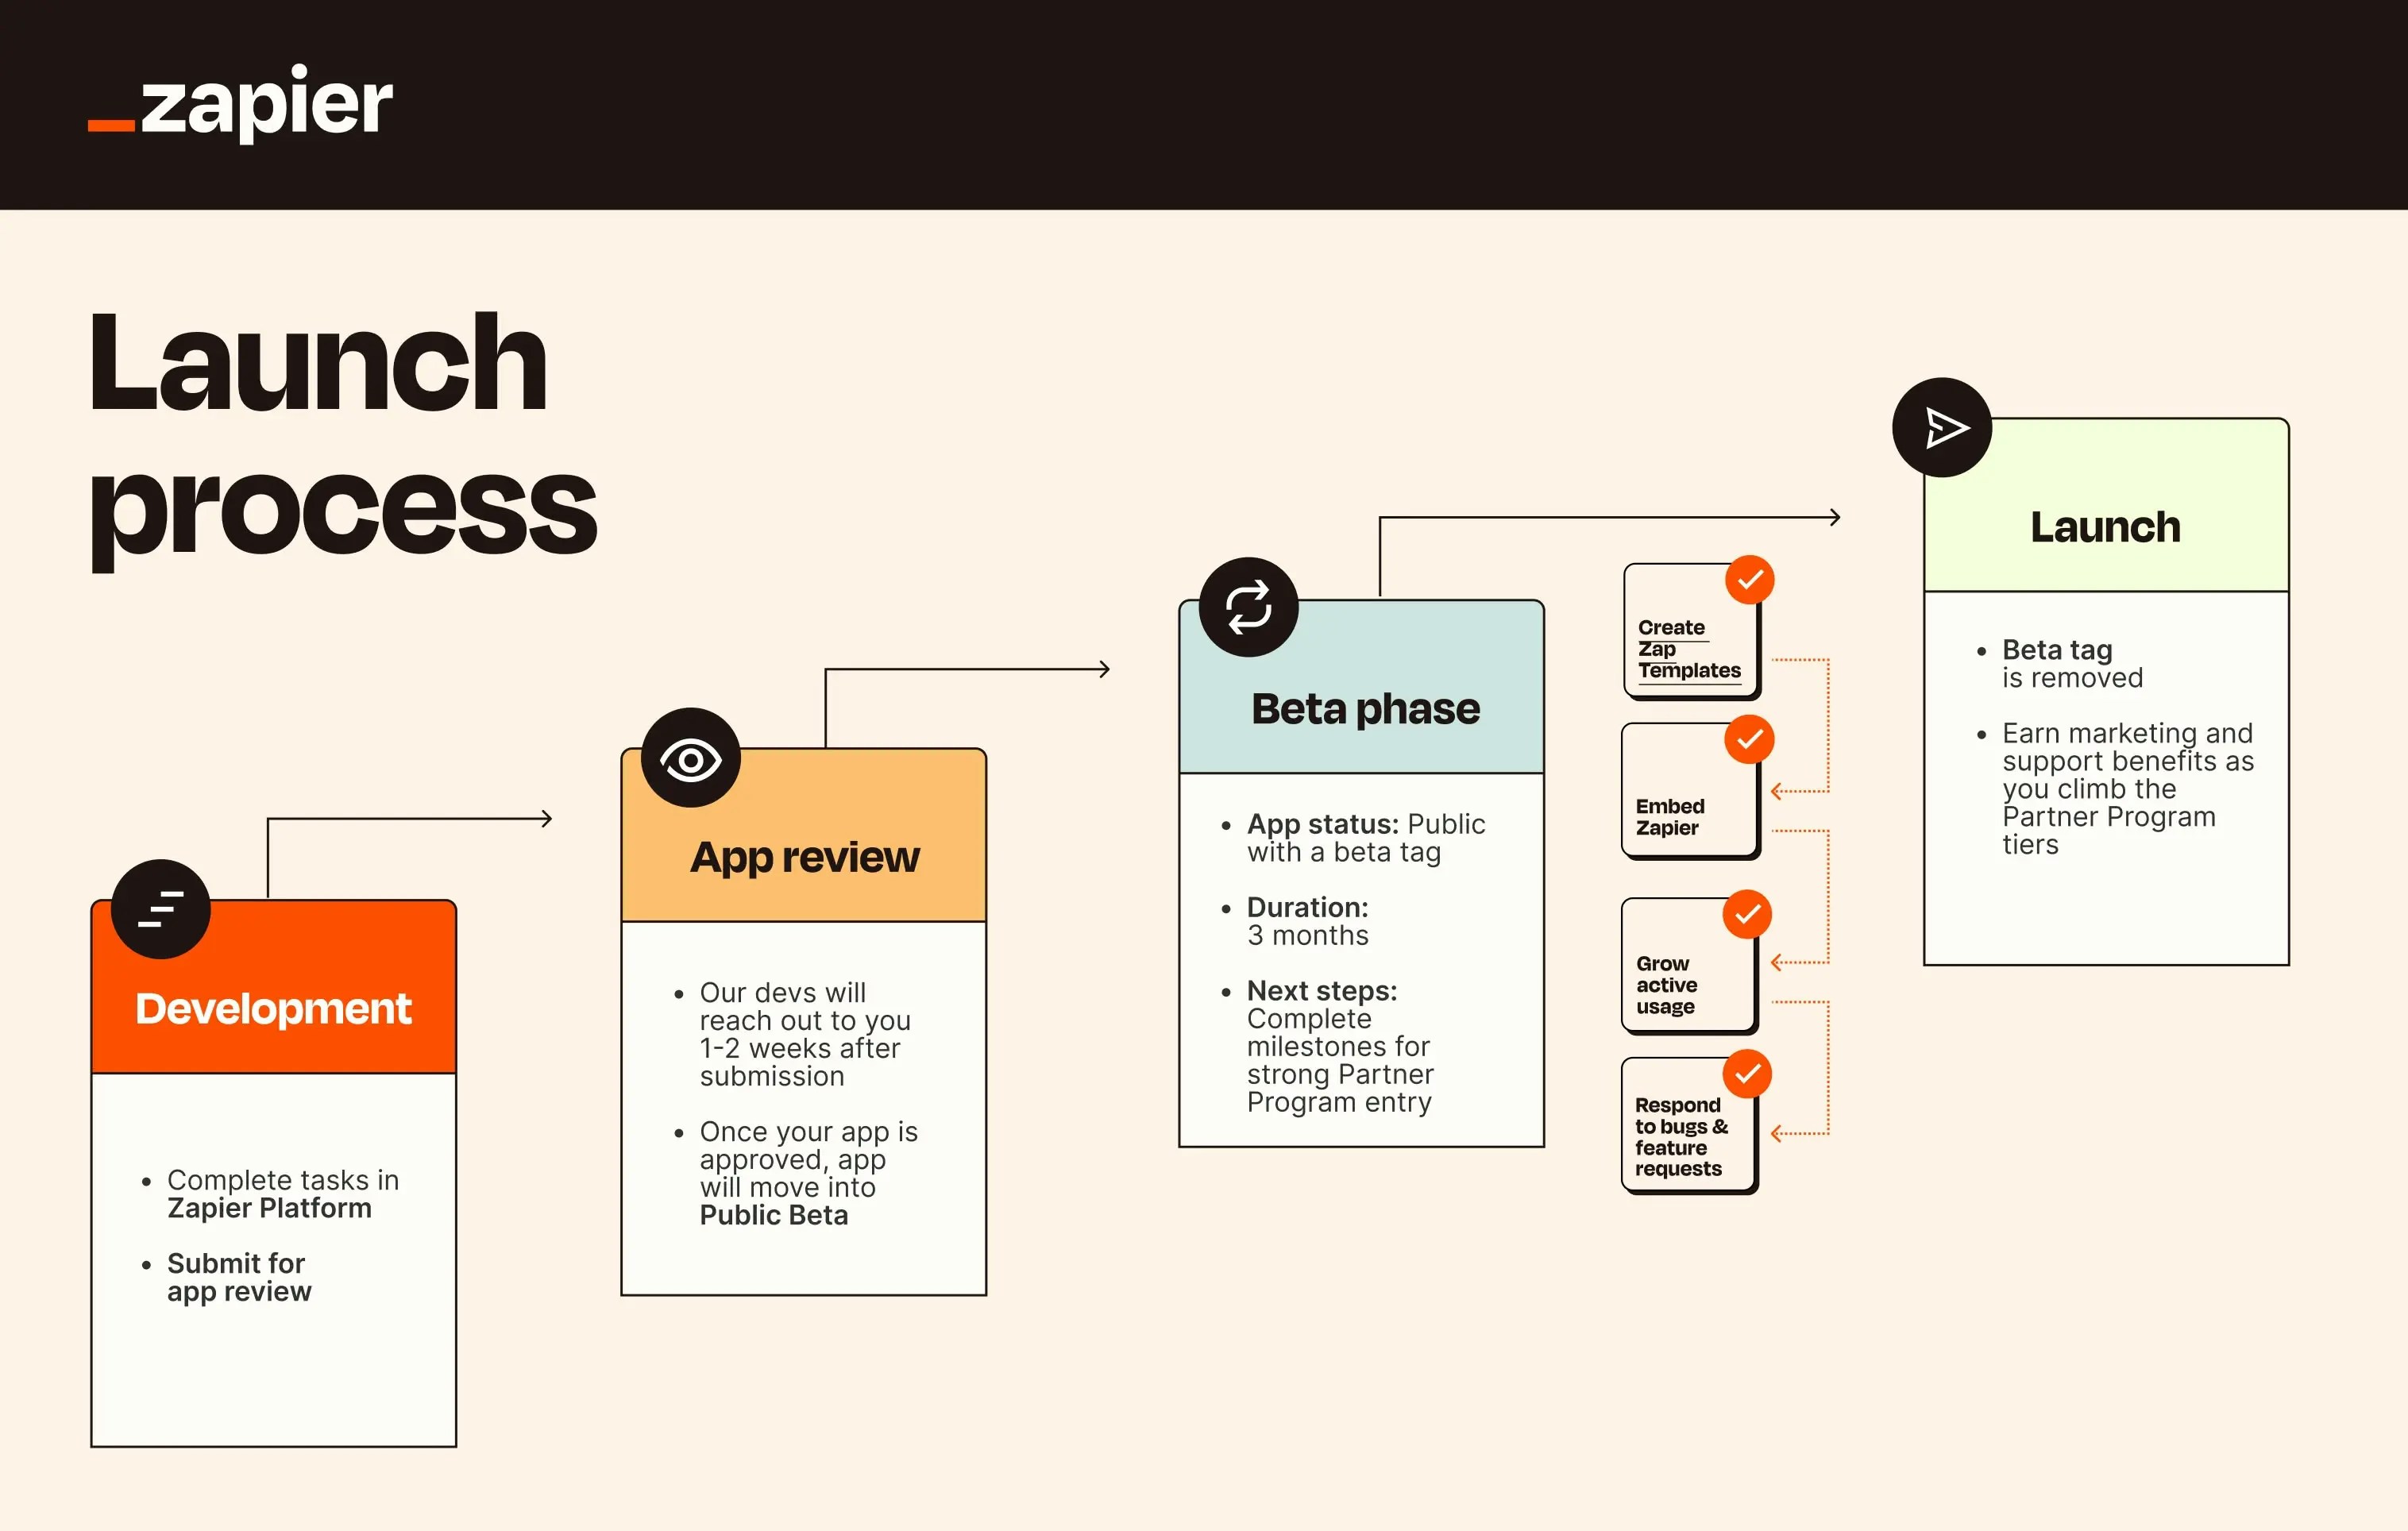
- App status to Beta.
- Integration will be added to Zapier’s app directory with a Beta tag.
Publish a support article in your help center
Publishing help documentation for your Zapier integration on your own website is an effective way to support users and reduce friction in adoption. When users can easily find clear, step-by-step guides, they’re more likely to successfully set up and maintain their automations without needing to contact support, improving the user experience. Consider embedding Zap templates, troubleshooting tips for common API responses, and visual guides to aid users. Learn more about writing help documentationCreate Zap templates
As soon as your app is published and in beta you can begin creating and sharing Zap templates. Zap templates are readymade integrations or workflows with the apps and core fields pre-selected. In a few clicks, they help people discover a use case, connect apps, and turn on the Zap. Learn more about creating Zap templates.Embed Zapier in your product or website
The best way to ensure users are able to discover your Zapier integration is to surface your integration where users are looking at it. By embedding Zapier in your product, you can create end-to-end user experience, helping your customers discover available integrations within your product without having to leave your app. Learn more about embedding Zapier.Grow active usage
During the beta stage of your integration, it’s important to actively work on growing the usage of your app. By encouraging more people to use your integration, you’ll be able to gather valuable insights and feedback early on, which will help you optimize it further. Learn more strategy tips for a successful integration.Manage bugs and feature requests
With the Zapier Issue Manager, you have the ability to conveniently address bugs and new feature requests within your preferred issue-tracking tool. Regularly reviewing and taking action on these items will greatly contribute to enhancing the overall health score of your integration. Learn more about Zapier Issue Manager.Exit Beta early by embedding your integration
When one signup for Zapier is detected from your implementation of a Zapier embed tool, you’ll exit Beta the next business day and unlock Partner Program benefits. The simplest option is to feature your Zap templates in a launch announcement. Additionally, you can present a dynamic gallery of the applications that are now compatible with your app for creating workflows.6. Public phase
After 90 days in public beta, your integration will become public:- Your app status will be updated to public, and the beta tag will be removed.
- You’re added to our Partner Program, where you can earn marketing and support benefits.
Need help? Tell us about your problem and we’ll connect you with the right resource or contact support.